
| 4 Wheel Version | 2 Wheel Version |
|---|---|
 |
 |
The goal of this project was to create a self driving car that could autonomously navigate to a desired point in the real world. This is primarily accomplished via the ARKit library which among many features includes image tracking and localization. By placing a specific image (below) within the field of view of a camera the image tracking software is able to locate the position of the image relative to the camera’s current position.

Hiro AR marker that robot follows
Using this information a program can drive motors connected to the camera and move towards the desired location.
The purpose of our MBED was to read commands from a phone via Bluetooth and parse those commands into directions for attached motors. We included functionality for four motors, but only two are required to drive the vehicle.

#include "mbed.h"

Serial blue(p28,p27);

DigitalOut myled(LED1);
PwmOut Motor1(p23);
PwmOut Motor2(p24);
PwmOut Motor3(p25);
PwmOut Motor4(p26);

int main()
{

	Motor1 = 0.0;
	Motor2 = 0.0;
	Motor3 = 0.0;
	Motor4 = 0.0;
	char bnum=0;
	char bhit=0;
	while(1) {
    	if (blue.getc()=='!') {
        	if (blue.getc()=='B') { //button data packet
            	bnum = blue.getc(); //button number
            	bhit = blue.getc(); //1=hit, 0=release
            	if (blue.getc()==char(~('!' + 'B' + bnum + bhit))) { //checksum OK?
                	myled = bnum - '0'; //current button number will appear on LEDs
                	switch (bnum) {

                    	case '5': //button 5 up arrow
                        	if (bhit=='1') {
                          	Motor1 = 0.5;
                          	Motor2 = 0.5;
                          	Motor3 = 0.5;
                          	Motor4 = 0.5;
                            	//add hit code here
                        	} else {
                            	//add release code here
                          	Motor1 = 0.0;
                          	Motor2 = 0.0;
                          	Motor3 = 0.0;
                          	Motor4 = 0.0;

                        	}
                        	break;
                    	case '6': //button 6 down arrow
                        	if (bhit=='1') {
                          	Motor1 = 0.0;
                          	Motor2 = 0.0;
                          	Motor3 = 0.0;
                          	Motor4 = 0.0;

                            	//add hit code here
                        	} else {
                          	Motor1 = 0.0;
                          	Motor2 = 0.0;
                          	Motor3 = 0.0;
                          	Motor4 = 0.0;
                            	//add release code here
                        	}
                        	break;
                    	case '7': //button 7 left arrow
                        	if (bhit=='1') {
                          	Motor1 = 0.2;
                          	Motor2 = 0.2;
                          	Motor3 = 0.95;
                          	Motor4 = 0.95;
                            	//add hit code here
                        	} else {
                            	//add release code here
                          	Motor1 = 0.0;
                          	Motor2 = 0.0;
                          	Motor3 = 0.0;
                          	Motor4 = 0.0;

                        	}
                        	break;
                    	case '8': //button 8 right arrow
                        	if (bhit=='1') {
                            	//add hit code here
                          	Motor1 = 0.95;
                          	Motor2 = 0.95;
                          	Motor3 = 0.2;
                          	Motor4 = 0.2;

                        	} else {
                            	//add release code here
                          	Motor1 = 0.0;
                          	Motor2 = 0.0;
                          	Motor3 = 0.0;
                          	Motor4 = 0.0;
                        	}
                        	break;
                    	default:
                        	break;
                	}
            	}
        	}
    	}
	}
}In order to facilitate communication between the MBED and our Swift code we utilized a fork of the Adafruit Bluefruit LE Connect app in conjunction with the MBED bluetooth module. This software allowed for the direct connection and communication between the phone and the MBED in order to move the robot to the anchor marker.
| mbed | Adafruit BLE |
|---|---|
| gnd | gnd |
| VU(5v) | Vin (3.3-16V) |
| nc | RTS |
| Gnd | CTS |
| p27 (Serial RX) | TXO |
| p28 (Serial TX) | RXI |
ARKit is an iOS based library for utilizing Augmented Reality in Swift. ARkit software was added onto a fork of the Adafruit Bluefruit app used for Marker Tracking and Localization in order to navigate the robot.
// threshold for how much marker move left before turning left
if (self.x > 0.1) {

  command = "LEFT"
    // send !B7 on command to turn right wheels turning car left
    if let delegate = self.delegate {
        delegate.onSendControllerPadButtonStatus(tag: 7, isPressed:true)
    }

// threshold for how much marker move right before turning right
}else if (self.x < -0.08){
    command = "RIGHT"
    // send !B8 on command to turn left wheels turning car right
    if let delegate = self.delegate {
        delegate.onSendControllerPadButtonStatus(tag: 8, isPressed: true)
    }

}else{

  if (self.z > 0.2){
      command = "FORWARD"
      // send !B5 on command to go forward
      if let delegate = self.delegate {
                        delegate.onSendControllerPadButtonStatus(tag: 5, isPressed: true)
                    }
    }else{
        if let delegate = self.delegate {
          command = "STOP"
          // send !B5 off command to stop all motors
          delegate.onSendControllerPadButtonStatus(tag: 5, isPressed: false)
      }
    }
}In order to navigate the Robot to the specified location, a method of dead reckoning was used alongside AR. Two markers were made by the ARKit, an Anchor Marker of the declared destination and a Position Marker of the phone. With these two markers, we were able to figure out which direction to turn by comparing the X-vector of the Anchor and the Position Marker as well as figure out our relative position to the Anchor using the Z-vector. When our Position Z-vector reaches the Anchor Z-vector and the X-vectors match, the robot will stop.
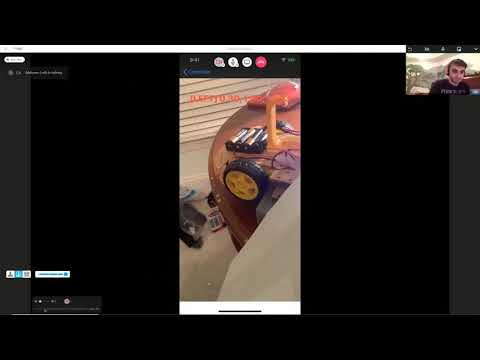
Due to the COVID-19 outbreak we all decided to build our own scale vehicle. The 4180 Sparkfun kit includes many of the parts required to build one, but many of us decided to purchase a Car Chassis Kit from Amazon. The kits purchased required soldering for the motors, but these could be swapped for the pre-soldered equivalents in our 4180 kits.
Major Components
- MBED LPC 1768
- Adafruit Bluefruit (BT module)
- 2-4 Wheels
- 2-4 Motors
- Car Chassis
- Breadboard
- Dual High-Power MOS Transistor Driving Controller Module
- Battery Box + AA Batteries
- Phone
- (Optional) Phone Mount
The phone is connected via bluetooth to the MBED, but may also power the MBED via Serial. The phone processes camera input and relays commands to the MBED. The MBED parses the commands and drives the motors, directing the car as desired.
Here is a schematic of how all materials are wired
