![]()
![]()


Minimal Matplotlib visualizations for TensorKrowch, TensorNetwork, Quimb, TeNPy, and traced
PyTorch/NumPy einsum tensor networks.
These are exports generated with the library and the repository demos.
Tensor-network libraries expose different Python objects. This package gives them a small shared visualization API so you can inspect structure, tensor values, contraction playback, and normalized graph exports without rewriting plotting code for every backend.
The common entry points are:
show_tensor_network(...)
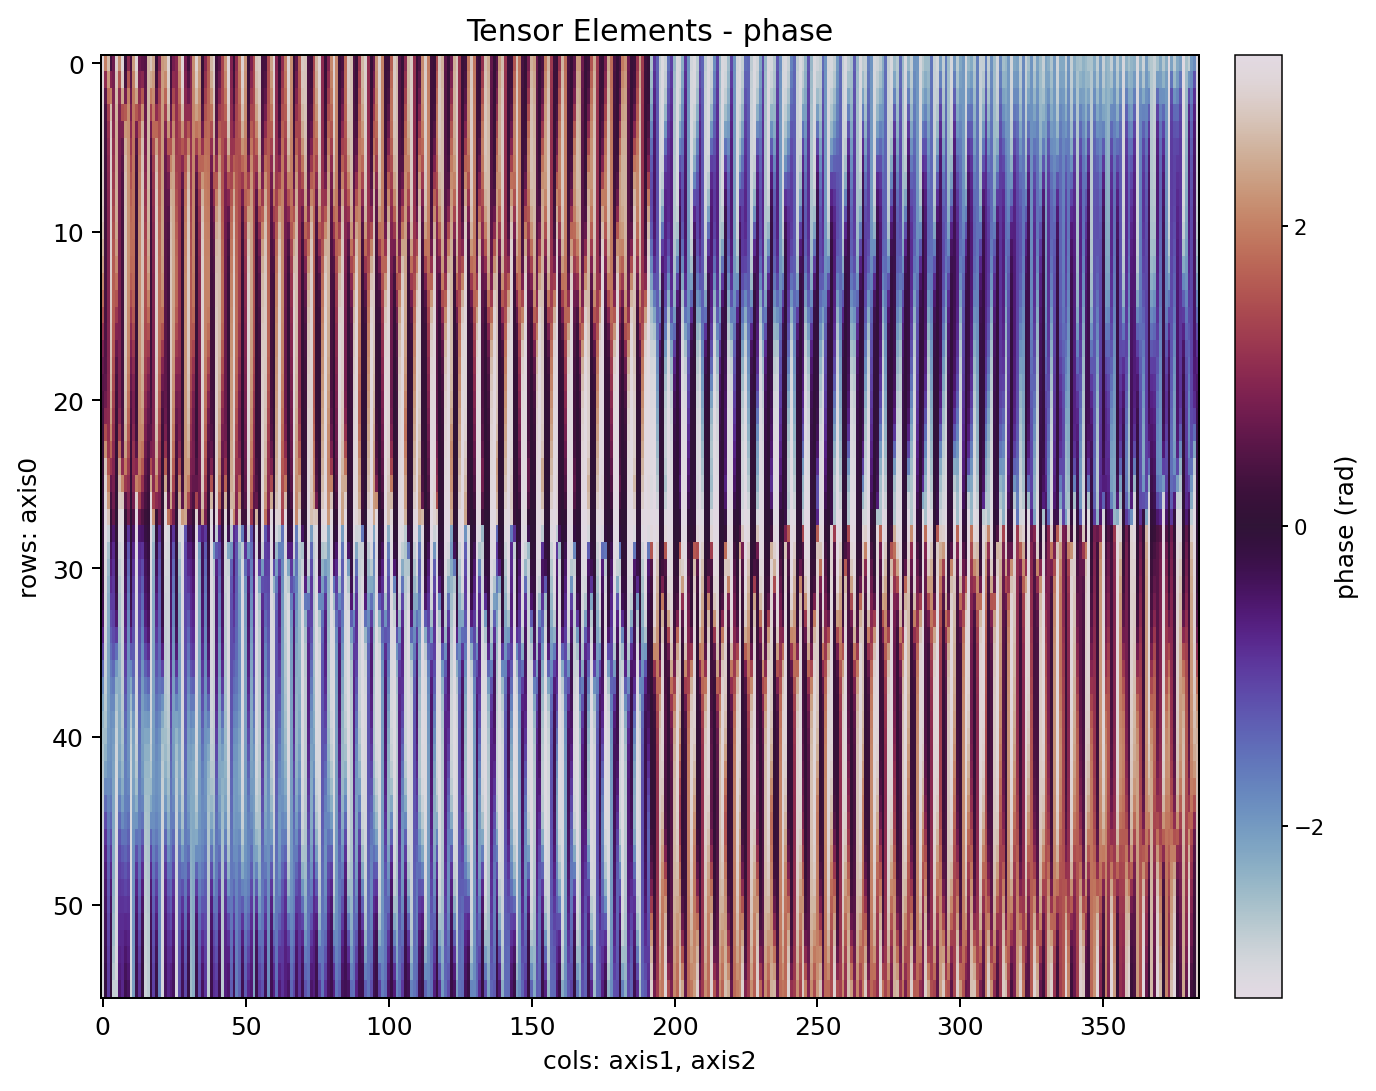
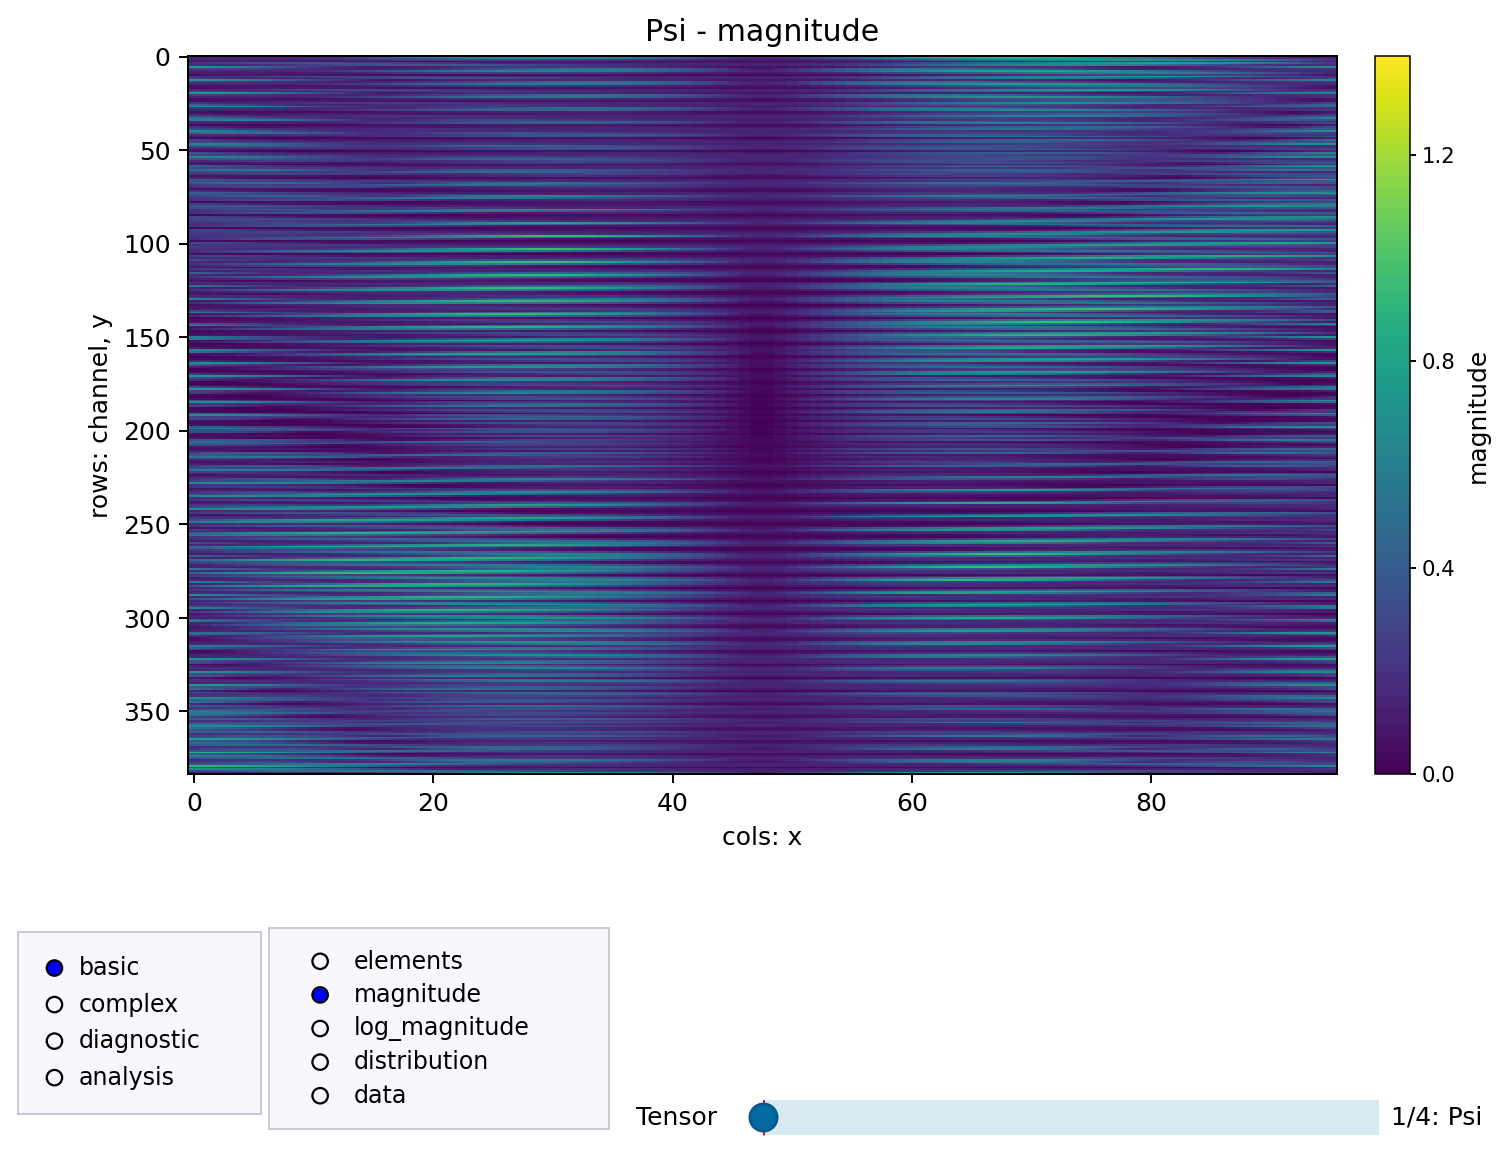
show_tensor_elements(...)
show_tensor_comparison(...)
translate_tensor_network(...)
normalize_tensor_network(...)
export_tensor_network_snapshot(...)If you want code for another backend rather than a figure, translate_tensor_network(...) can turn
supported TensorKrowch, TensorNetwork, Quimb, TeNPy, and traced einsum inputs into executable
Python for tensornetwork, quimb, einsum, or tensorkrowch.
- PyPI package name:
tensor-network-visualization - Import package:
tensor_network_viz - Requires Python 3.11 or newer.
python -m pip install tensor-network-visualizationThe base install only depends on numpy, matplotlib, and networkx.
For interactive Jupyter figures:
python -m pip install "tensor-network-visualization[jupyter]"For backend-specific packages, install the matching extra, for example:
python -m pip install "tensor-network-visualization[quimb]"See docs/installation.md for virtual environments, all optional extras, and local development installs.
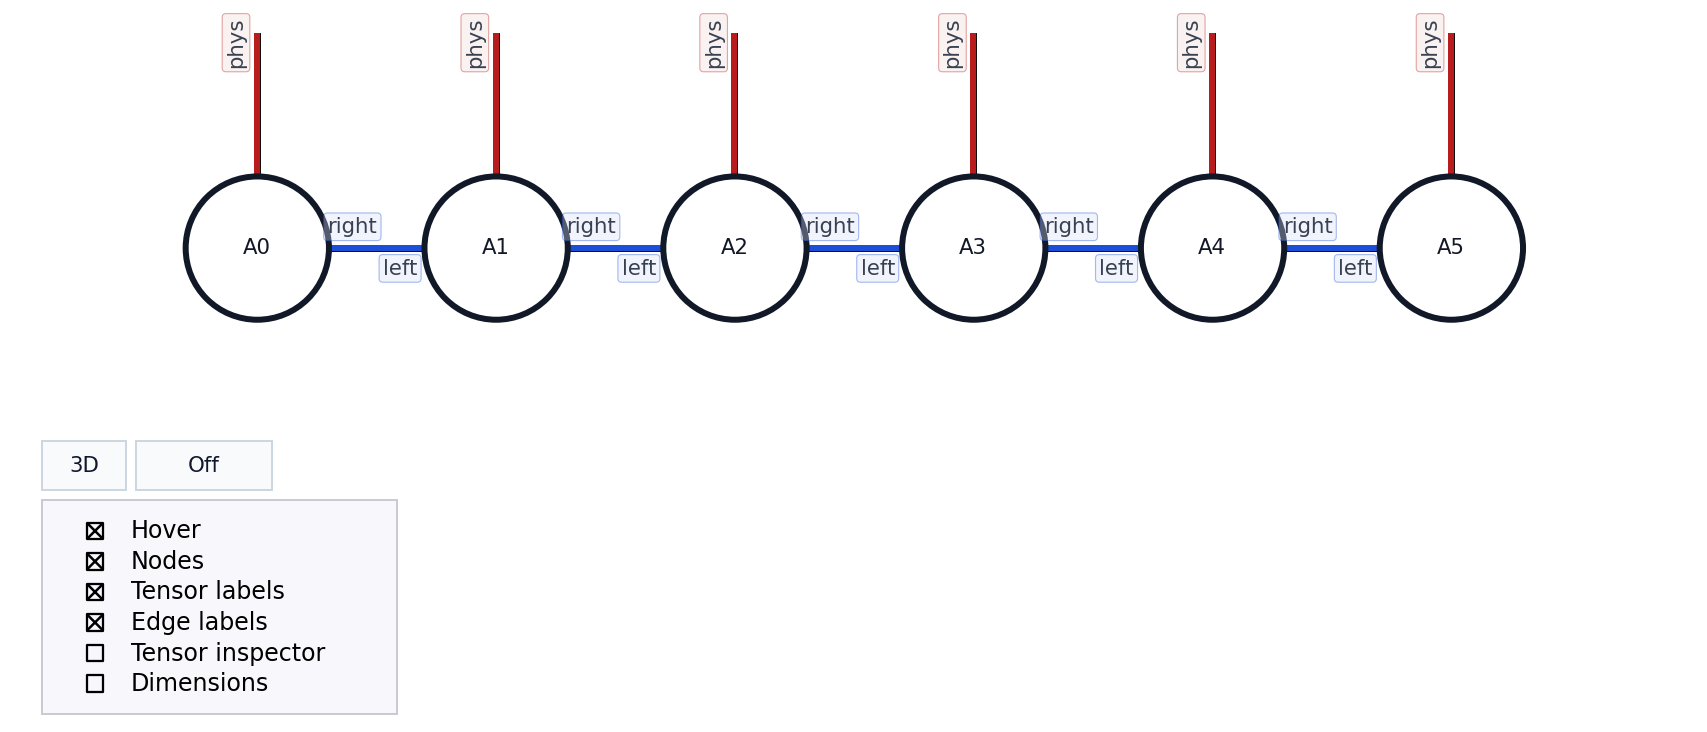
This example uses only base dependencies and a NumPy-backed EinsumTrace.
import numpy as np
from tensor_network_viz import EinsumTrace, PlotConfig, einsum, show_tensor_network

trace = EinsumTrace()
a = np.ones((2, 3), dtype=float)
x = np.array([1.0, -0.5, 0.25], dtype=float)

trace.bind("A", a)
trace.bind("x", x)
einsum("ab,b->a", a, x, trace=trace, backend="numpy")

fig, ax = show_tensor_network(
    trace,
    config=PlotConfig(show_tensor_labels=True, hover_labels=True),
    show=False,
)
fig.savefig("einsum-network.png", bbox_inches="tight")Install the TensorKrowch extra (see Installation for details):
python -m pip install "tensor-network-visualization[tensorkrowch]"import tensorkrowch as tk
from tensor_network_viz import PlotConfig, show_tensor_network
network = tk.TensorNetwork(name="demo")
left = tk.Node(shape=(2, 2), axes_names=("a", "b"), name="L", network=network)
right = tk.Node(shape=(2, 2), axes_names=("b", "c"), name="R", network=network)
left["b"] ^ right["b"]
fig, ax = show_tensor_network(
network,
config=PlotConfig(show_tensor_labels=True, show_index_labels=False),
show=False,
)
fig.savefig("tensorkrowch-network.png", bbox_inches="tight")Use show=False when you want to save or customize the figure yourself. Use
show_controls=False when you want a clean static figure with no embedded Matplotlib controls.
In a notebook, use this exact recipe:
%pip install "tensor-network-visualization[jupyter]"If you just installed that extra in the current kernel, restart the kernel once. Then, in the first plotting cell:
%matplotlib widget

from tensor_network_viz import PlotConfig, show_tensor_network

fig, ax = show_tensor_network(
    network,
    config=PlotConfig(show_tensor_labels=True, hover_labels=True),
)
See Installation and User Guide for details.
- Installation: virtual environments, optional extras, Jupyter, and local editable installs.
- API Reference: public functions, configuration objects, snapshots, exceptions, and logging.
- User Guide: workflows, notebooks, exports, layouts, tensor inspection, comparisons, snapshots, and performance tips.
- Layout Algorithms: node placement and free-edge direction rules in 2D and 3D.
- Backend Examples: copy-paste examples for TensorKrowch, TensorNetwork, Quimb,
TeNPy, and
einsum. - Troubleshooting: common install, Jupyter, Matplotlib, backend, and data issues.
- Repository Examples: command-line demo launcher and example catalog.
- Demo Commands: copy-paste commands for every repository demo.
The repository examples are organized around the same launcher:
python examples/run_demo.py <group> <demo>The gallery includes backend demos for TensorKrowch, TensorNetwork, Quimb, TeNPy, and einsum,
plus three focused groups:
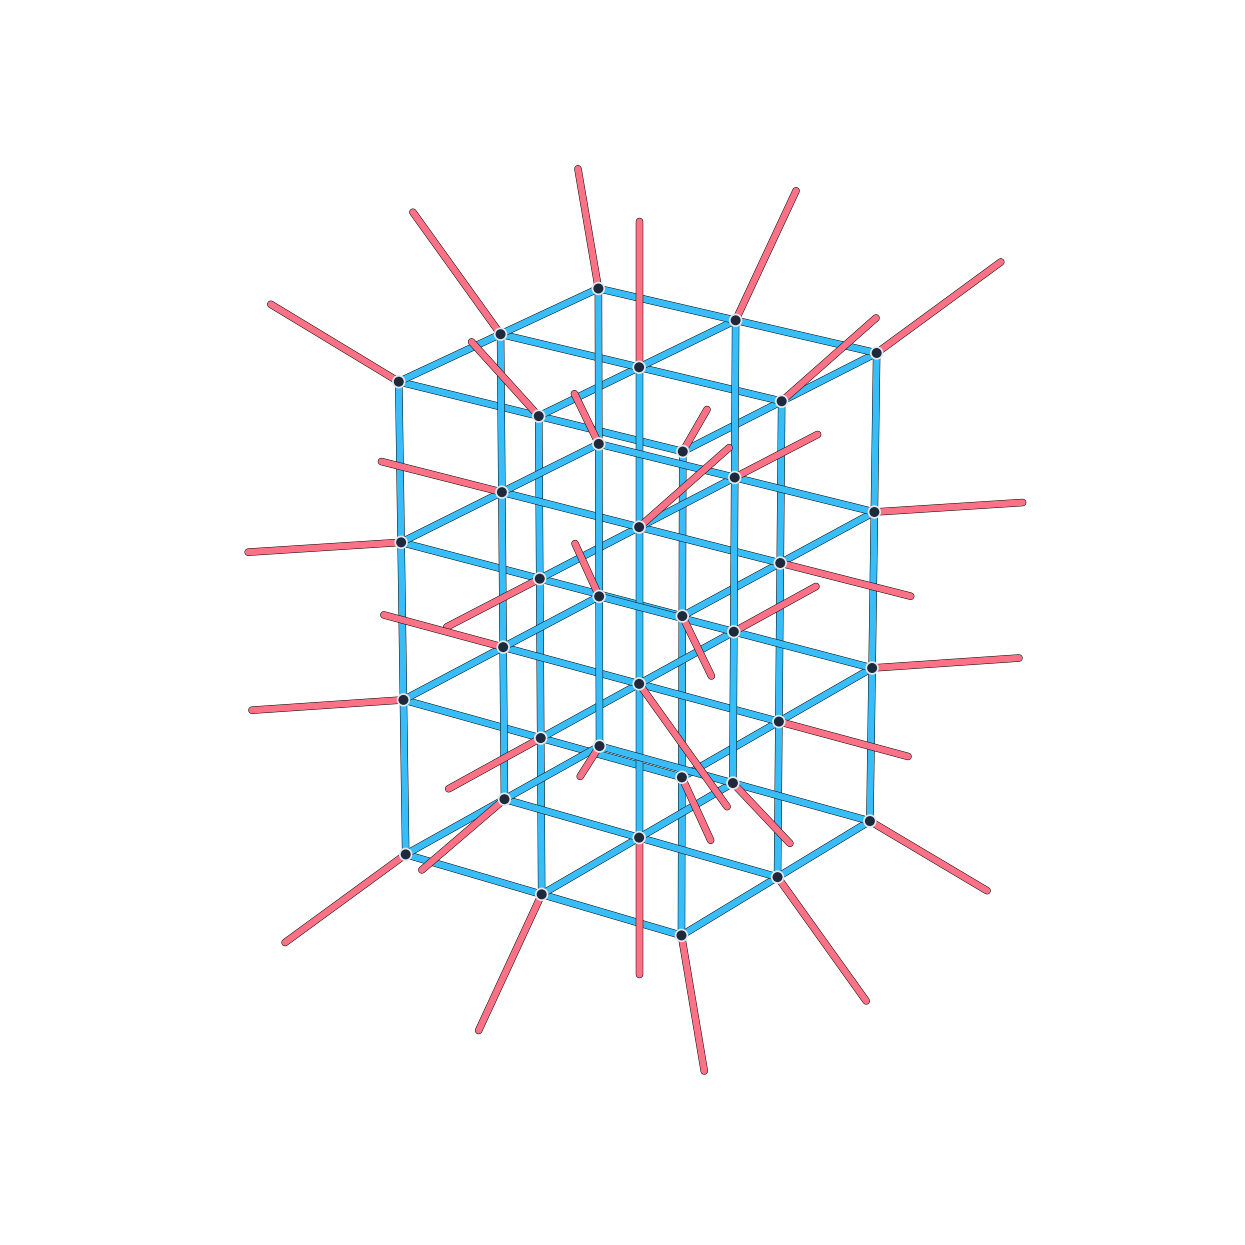
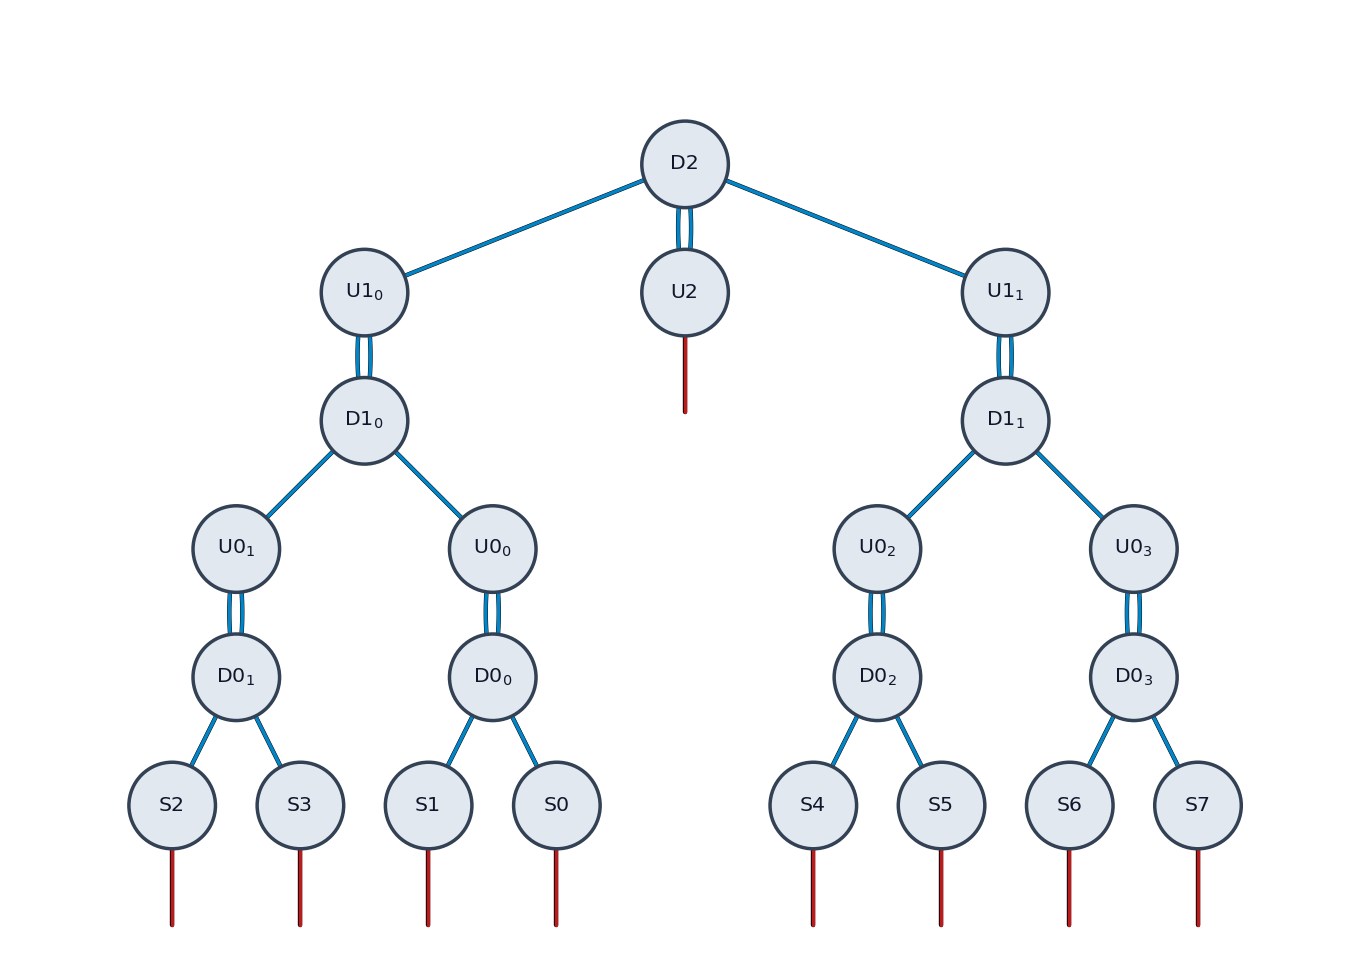
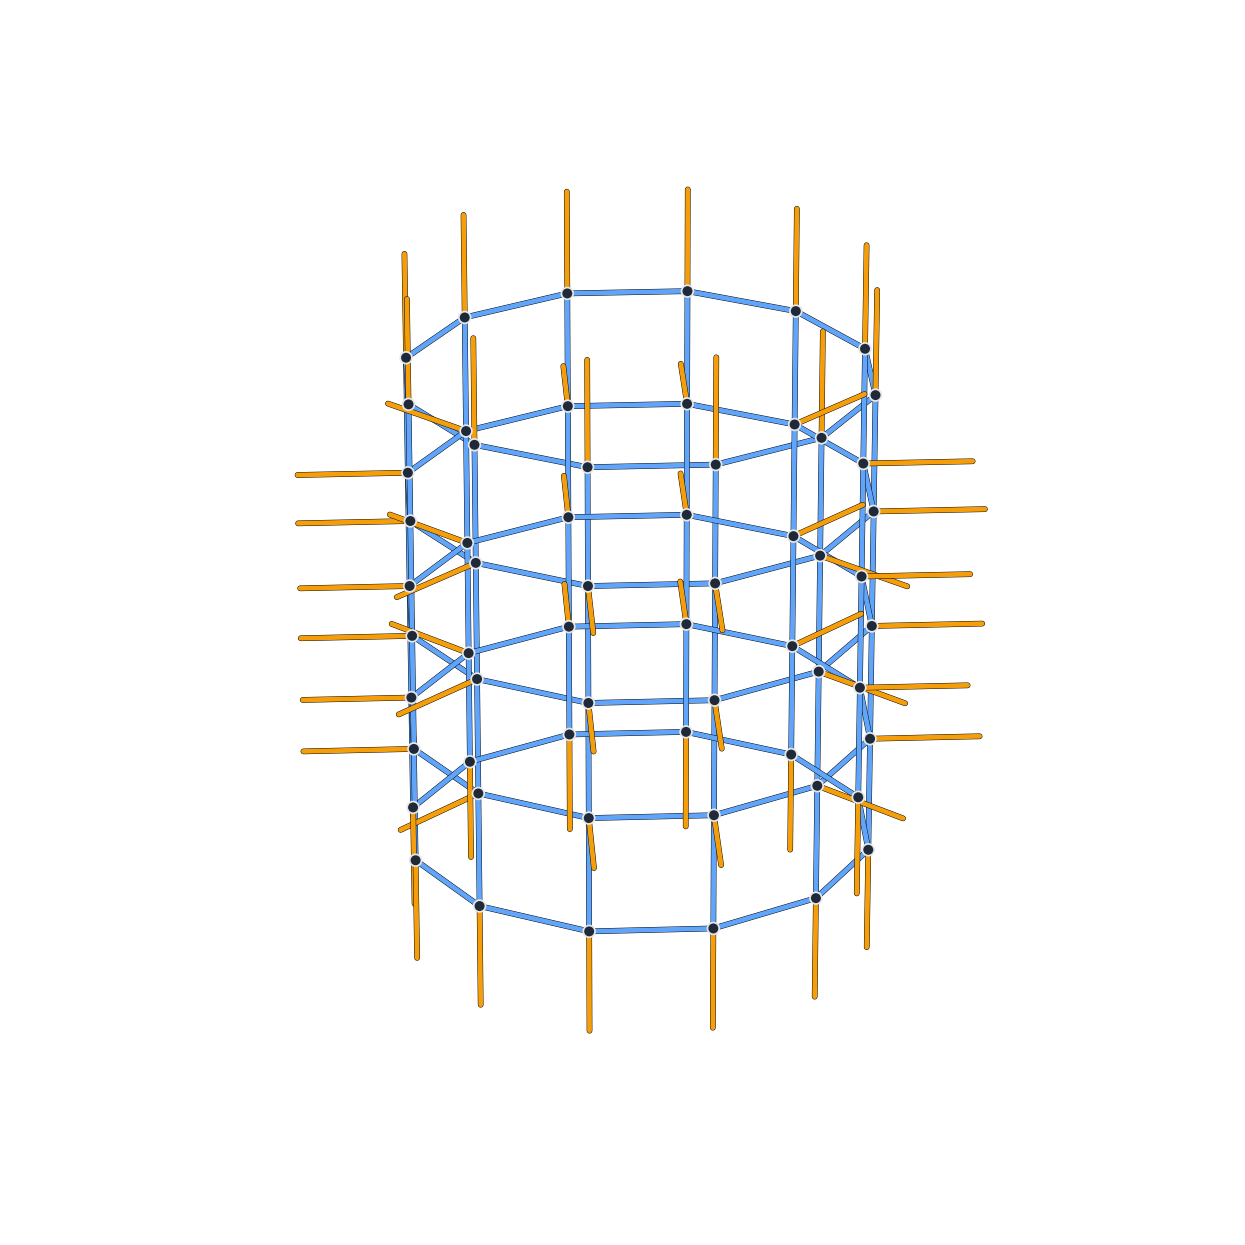
themes overview: compares thePlotConfigvisual presets for tensor-network figures.themes tensor_elements: compares theTensorElementsConfigpresets forshow_tensor_elements(...)and the linked tensor inspector.placements: shows object, list, 2D grid, 3D grid, manual positions, manual schemes, and named index inputs.geometry: renders larger irregular, incomplete, triangular, pyramidal, circular, and disconnected networks.
There is also a dedicated translation demo:
python examples/translate_demo.py --source-engine tensornetwork --target-engine quimb --example mpsIt generates Python code for the translated tensor network and can render the original and translated versions side by side for comparison.
For batch checks, use:
python examples/run_all_examples.py --group engines --views 2d --list
python examples/run_all_examples.py --group all --views 2d --output-dir .tmp/examples