This program is a GUI interface along with installer for verilator.
This program installs the stable version of verilator and also provides a GUI powered by PyQt5.
Download the installer.sh file.
You can do this either by cloning the repo or directly downloading it from Google Drive.
An alternate download link is provided because the installer.sh is somewhat of a big file and GitHub doesn't allow files above 100 MiB
So, the file was uploaded using git-lfs and hence has this bandwidth restriction of 1 GiB. So, once the 1 GiB monthly bandwidth is used, downloading the file would not be possible. This Google Drive link was provided to ensure that the installer.sh file would be accessible even amidst a wear out of the monthly free bandwidth that git-lfs provides.
Once downloaded open a terminal in the directory in which the installer file has been downloaded.
Then:
chmod +x installer.sh
./installer.sh
This will now install the program in a folder named verilator_gui inside your home directory.
For the installation changes to take place, either start a new terminal window or run
source ~/.bashrc
The program is accessible from the dist directory inside the verilator_gui directory
cd ~/verilator_gui/dist
One could now simply open up the program by
./main
The software Verilator does comes packaged inside this program and is installed when running the installer.sh.
The stable version inside the Verilator GitHub repo was compiled along with a GLIBC 2.31 so that it would support a wide variety of distros especially the Debian based ones that still hasn't moved on to the later versions such as GLIBC 2.35 or GLIBC 2.34.
Additional dependency warnings if any will be displayed in the dialogue box that opens up once the Build button is pressed inside the program.
Once properly installed open the program from the directory at which the program was installed.
cd ~/verilator_gui/dist
./main
Now, the GUI build using PyQt5 will open up.
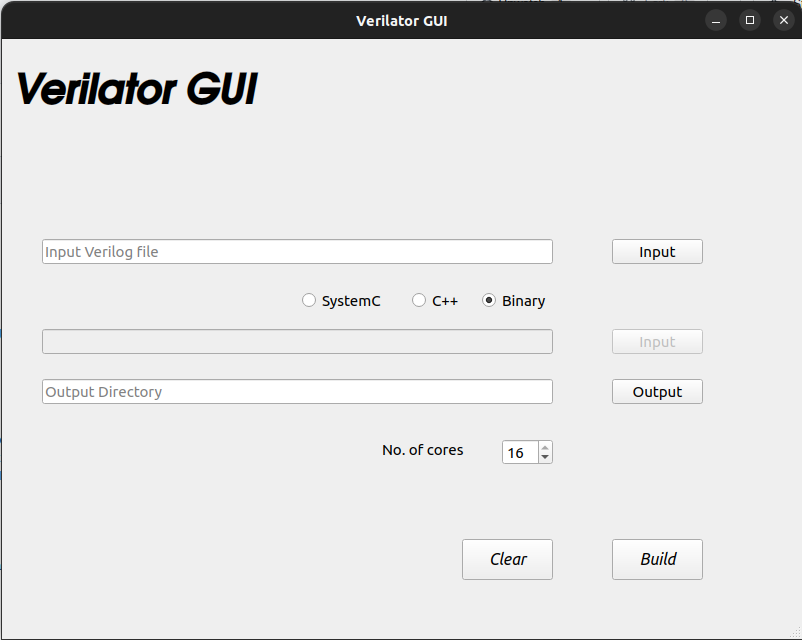
In the program there will be 3 text fields associated with each, a button as well.
Along with the first field is a button with Input written inside it.
Clicking that button will open a dialogue box that helps to pick a verilog file.
Along with the second field is a button with Input written inside it.
Clicking that button will open a dialogue box that helps to pick a wrapper file.(For binary mode the button will be disabled)
Along with the first field is a button with Output written inside it.
Clicking that button will open a dialogue box that helps to pick a directory to where the compiled simulation is to be saved.
Inside the directory mentioned in the Output field there will be a directory named obj_dir inside which the simulation will be present.
It can be executed as follows:
cd <output dir>
obj_dir/Vour
Along with this there is a radio button that helps to pick whether to use a C++ execution or a SystemC execution.
The spinbox helps to set the number of cores that will go into the make command for compilation.