In chapter 08, we start to integrate OpenCV-python with Blender python.
Later, we will combine the state-of-art AI models with Blender python.
Specifically, in this chapter,
-
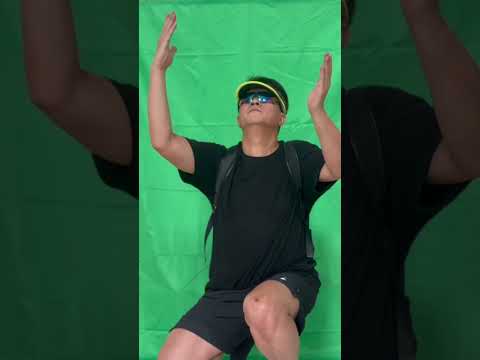
We will use Blender python to implement green screen, to extract the human subject and their motion from the green screen background video footage.
-
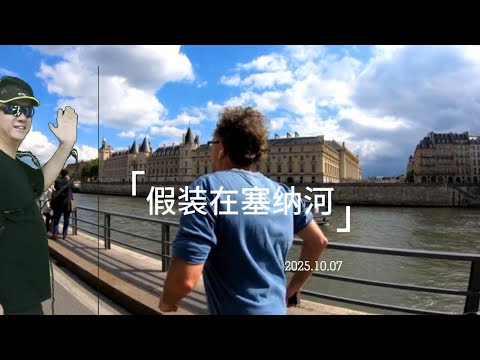
Given another video footage, like the scene of Seine river in Paris, we use OpenCV-python to inverse calculate the motion of camera, especially its pan and tilt.
-
Given the time series of camera motion, we use OpenCV-python to process the human subject motion video footage, to make the human motion aligned with the scene video footage's pan and tilt.
We are integrating OpenCV-python and Moviepy with Blender python.
-
OpenCV
We will use OpenCV python to load the video and do image enhancement, including cropping, stabilization, denoising and color adjustment.
In addition, we will use OpenCV to do feature tracking, or more advanced PnP/Homography solving to calculate a relative camera transformation matrix per frame.
Also we will use OpenCV to do object detection or background subtraction to generate per-frame masks (e.g., identifying a green screen, or isolating a tracked object) to assist in rendering or compositing later.
-
MoviePy
MoviePy and Blender's Video Sequence Editor (VSE) share a lot of features, but MoviePy is more convenient to work with. Therefore, we intend to use MoviePy to replace the VSE in our pipeline.
Especially, we will use MoviePy to load various media files, including the video footage of various formats, and image sequence, in addition to audio and textual caption for the video.
Also, we will use Moviedy To clip a segment from a video, audio.
And finally, we will use MoviePy to assemble multiple layers of media together to deliver the final video file.
-
Blender
Blender is good at modeling that create a virtual object and scene of the real world, including landscape, city and indoor environment. Furthermore, there are a lot of tools or even completed 3D assets available on market, that will save a lot of development human cost.
Blender is also good at 3D animation adhering to the physics laws.
Blender excels at implementing visual effects (VFX), including fire, massive waves, explosions, avalanches, and building collapse.
In addition, there are many Blender material assets available on the market, including wood, metal, and plastic etc.
For image and video enhancement, Blender features numerous compositing add-ons that can significantly enhance the quality of videos and images, giving them a cinematic look.
-
AI vision models
The vision models are useful for image and video analysis, including image segmentation, object recognition and tracking, etc.
-
AI image and video generation models.
The generation models can generate 2D images and videos automatically, given only a textural prompt. We are very interested in the progress of AI 3D model and scene generation, including the static ones and the dynamic animations.
Since Blender is not yet good at modeling human subjects, maybe we can leverage AI video generation model to generate human subject. However, the challange is that how to generate 3D human subjects, and how to generate human subjects' motion that is physically accurate.
-
3D gaussian splatting (3DGS)
For the time being, 3DGS is often used to scan the static objects including human bodie, static city street views, and static landscape.
However, the challange is that how to generate human body in motion that is physically accurate.
$ /home/robot/blender-4.4.3-linux-x64/4.4/python/bin/python3.11 -m pip install \
    --upgrade opencv-python
$ /home/robot/blender-4.4.3-linux-x64/4.4/python/bin/python3.11 -m pip install \
    --upgrade opencv-contrib-python

$ /home/robot/blender-4.4.3-linux-x64/4.4/python/bin/python3.11 -m pip install moviepy

$ /home/robot/blender-4.4.3-linux-x64/4.4/python/bin/python3.11 -m pip install scipy
$ /home/robot/blender-4.4.3-linux-x64/4.4/python/bin/python3.11 -m pip show scipy
Notice that when using OpenCV-python within Blender, don't call the GUI-related functions like cv2.imshow() and cv2.waitKey(),
otherwise, segmentation faults (core dumped) will be throwned.
The root cause is that OpenCV's GUI related functions will call Qt libraries like libQt5XcbQpa, libQt5Gui, etc.
When these functions are called inside Blender's Python environment, they conflict with Blender's own GUI system, leading to the segmentation fault.
To execute the demo, we ran the following command in a ubuntu terminal.
$ cd /home/robot/movie_blender_studio
$ blender -b -q --python main.py -- --cycles-device CUDA
Look into main.py, there are two demos related to this chapter.
 from tracking.camera_tracker import CameraTracker
 CameraTracker.run_demo()

 from video.image_sequence_strip import ImageSequenceStrip
 ImageSequenceStrip.run_demo()
-
Camera tracking
tracking/camera_tracker.pyuses OpenCV-python to track the pan-tilt motion of camera, given a video clip. -
Green-screen keying
video/image_sequence_strip.pywill callcompositing/green_screen_compositor.pyto turn the green pixels of the green-screen to transparent.However in practice,
compositing/green_screen_compositor.pythat relies on Blender's compositing nodes doesn't work reliably.Especially after the affine transformation of the original green-screen MOV video using OpenCV-python,
compositing/green_screen_compositor.pycannot do the keying job very well.Later, we will use AI vision model to handle green-screen keying, and other jobs, that is expected to work more robustly.
Using 3D Gaussian Splatting (3DGS) is not only beneficial for quickly modeling individual objects but also for rapidly constructing entire scenes.
The scenes and objects built with 3DGS can be combined with other 3D objects in Blender, along with lighting setups and camera movement rails, to quickly set up a virtual movie studio.
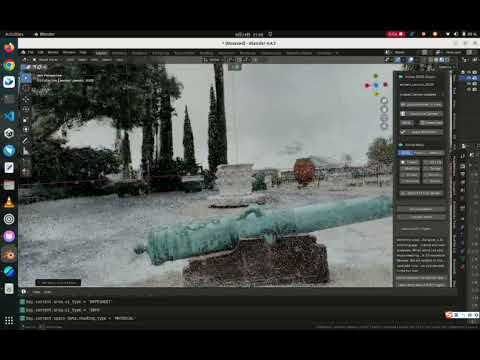
We tested the Blender 3DGS plugin developed by Kiri Engine, with the following environment, Ubuntu 22.04, Nvidia RTX 3070Ti/CUDA 12.4, and Blender 4.4.3.
-
Currently, 3DGS is more suitable for building static objects.
For moving objects such as people, animals, and machinery, 4DGS is required. Although the technology is still immature, it has great potential.
-
The Kiri 3DGS addon with Blender 4.4.3 running in Ubuntu, its image granularity is relatively coarse and the image quality is not clear enough.
For the time being, the objects and scenes constructed with 3DGS are more suitable for backgrounds, rather than for close-up shots.
-
Lighting setup is easy, but shadow creation is difficult.
The difficulty in shadow creation lies in the fact that when generating MP4 video files, only the EEVEE rendering engine can be used for 3DGS-constructed objects and scenes, while the CYCLES engine cannot.
However, we do need CYCLE engine, because the video quality generated using the CYCLES rendering engine is far better than that of EEVEE.
There is a solution, but it is currently relatively complex.
Two layers are needed, one layer uses the EEVEE rendering engine to generate video of 3DGS objects and scenes with a transparent background, and the other layer uses CYCLES to generate video of other objects and scenes with an opaque background.
After then, overlay these two layers of video together.
- Test run of 3DGS with KIRI Blender addon
- Pretend to travel around the world with greenscreen
- Pretend to walk along the Seine